

Author name: Seo_executive

Uncategorized

7 Top Cutting Techniques Every Chef Must Know!

Mastering essential cutting techniques for chefs: from cross chop to batonnet. Everything you need to know! Becoming skilled in using a chef’s knife is an essential art that every chef must master to stand out from the rest and work towards becoming a head chef. Knowing recipes, cooking techniques, and appropriate attire for the job is essential for a chef, but learning and mastering different cutting techniques is equally important. From the Julienne to the Batonnet, chefs are under constant pressure to learn the cuts, chops, slices, and dice. Here are some crucial cutting techniques that every chef should know to excel at their job and improve their skills. 1. Cross Chop : One of the cutting techniques that chefs should learn is the Cross Chop. This technique is ideal for quickly chopping small vegetables or herbs without worrying about presentation. To execute the Cross Chop, hold the knife’s handle with one hand and place the other hand on top of the blade to guide and control the chopping pace. Then, lift the handle of the blade and chop while keeping the tip of the blade down. As your hands are out of the way, they will be safe. 2. Rock Chop :  Another useful technique is the Rock Chop, which is similar to the Cross Chop. Hold the handle of the blade, keep the tip of the knife down on the board, and use your other hand to move the ingredient. As you chop, keep the blade still and push the vegetable-forward. Remember to curl your fingers to keep them safe from the blade. 3. Julienne Cut : The Julienne Cut is a fine cut where the thickness of each slice is between 1-2 mm. It involves cutting the vegetables into thin rectangular shapes, followed by using the fine slice technique to create thin matchstick shapes. This technique is commonly used for carrots, celery, and Julienne Fries from potatoes. Mastering the Julienne Cut is essential as it is the initial step for other types of cuts. 4. Brunoise Dice : Chefs can use the Brunoise Dice technique to dice the ingredients into small cubes. The cube size should be 2mm x 2mm x 2mm, making it the smallest dicing cut, popularly used for soups. 5. The Small Dice : The Small Dice technique is a slightly larger cut than the Brunoise Dice, with dimensions of 3mm x 3mm x 3mm. Chefs can begin this technique by Julienne Cutting the ingredients and then dicing them into slightly bigger cubes than the Brunoise. 6. The Batonnet : The Batonnet technique is used to cut baton-shaped vegetables like chips, with dimensions of 6mm x 6mm x 6mm. The Baton technique, on the other hand, is used to create large dice with dimensions of 12mm x 12mm x 6cm. Although not regularly used, the Baton technique is still a useful technique to master. 7. Pont-Neuf :  Lastly, the Pont-Neuf technique is only related to cutting potatoes. After peeling and washing the potatoes, cut them into 2cm x 7cm shapes to create chunky chips. Every chef must learn and master these cutting techniques to become an expert in their field. With regular practice, even new chefs can become professional chefs. Do you have a passion for culinary? Learn culinary art at its finest only at IBCA, India’s Most Premium Culinary Art Institute. Start your career as a professional chef today! Admission is open for July 2024 Batch, Apply Now!!

Uncategorized

Top 8 Tips For Writing A Chef Resume

Are you a chef looking to land your dream job? Your resume is the first step in the hiring process, and it needs to be a standout document to get you noticed. Here are some tips to help you create a chef resume that will impress potential employers: 1. Start with a strong header: The header of your resume should include your name, address, phone number, and email address. Make sure it’s clear and easy to read. 2. Highlight your experience: The experience section of your resume should showcase your culinary expertise. List your previous jobs in reverse chronological order and include details about your responsibilities and achievements. 3. Showcase your skills: In addition to your experience, highlight your culinary skills. Include any relevant certifications, such as ServSafe, and list any specializations, such as pastry or sushi. 4. Use keywords: Many companies use Applicant Tracking Systems (ATS) to screen resumes. Use keywords from the job description to make sure your resume gets past these filters. 5. Keep it concise: Your resume should be no longer than two pages. Use bullet points to keep it easy to read and avoid long paragraphs. 6. Include a professional summary: A professional summary is a brief statement at the top of your resume that summarizes your experience and skills. It’s a great way to catch the employer’s attention and make a good first impression. 7. Tailor your resume to the job: Customize your resume to the specific job you’re applying for. Highlight the skills and experience that are most relevant to the position. 8. Bonus tip! Sending your resume in a word processing format, such as Microsoft Word or Google Documents, is not recommended. The manager’s application or device could alter the format of your resume, giving the impression that you’re disorganized and unprofessional. Share your résumé as a PDF instead. Regardless of the hardware or PDF reader the manager uses, this is a static format that will display precisely the same on any device. Make It Count: Your Resume Is Your First Contact! It takes some practice to become proficient at writing a cook or chef resume. But if doing so would help you land your dream career, it will be well worth the effort! In conclusion, your chef resume should be a reflection of your culinary expertise and showcase your skills and experience. Use these tips to create a standout resume that will impress potential employers and help you land your dream job.

Uncategorized

Authentic Recipes Around The World in 2026

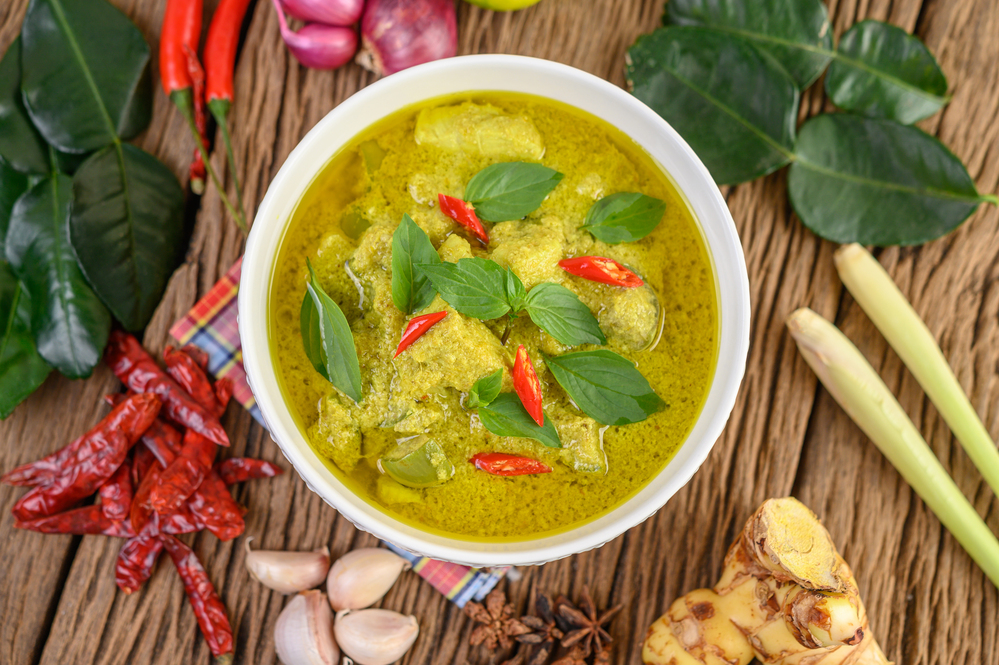
What makes a meal truly marvelous? Is it the presentation? While the ingredients surely play a part, most would agree that the technique used in the cooking and the chef’s patience are the deciding factors in a delicious meal. The flavors only come out once the food is cooked right. Therefore, we are providing recipes from various countries and regions and instructing how to make them authentically. Here is a list of recipes and advice for preparing them traditionally: Thai Green Curry To make an authentic Thai Green Curry, use fresh herbs and spices such as lemongrass, galangal, and kaffir lime leaves. You can also add vegetables like bamboo shoots, eggplant, and bell peppers, along with protein such as chicken, beef, or tofu. Serve it with jasmine rice and garnish with fresh basil leaves.   Mexican Tacos To make authentic Mexican Tacos, use soft corn tortillas, and fill them with seasoned meat, such as pork or beef, or grilled vegetables like peppers and onions. Top it with chopped onions, cilantro, and a squeeze of lime juice. You can also add salsa, guacamole, and sour cream to it.   Italian Carbonara Pasta To make authentic Carbonara pasta, use pancetta instead of bacon, and add fresh egg yolks, Parmesan cheese, and black pepper to the pasta while it’s still hot. Don’t use cream or milk, as it’s not traditionally used in Carbonara.   Indian Butter Chicken To make an authentic Indian Butter Chicken, marinate the chicken in yogurt and spices like cumin, coriander, and garam masala. Cook it in a tomato-based curry with butter, cream, and fenugreek leaves. Serve it with basmati rice or naan bread.   Japanese Sushi To make authentic Japanese sushi, use high-quality sushi rice, seasoned with rice vinegar, sugar, and salt. Add fillings like fresh fish or seafood, avocado, cucumber, or pickled vegetables. Serve it with soy sauce, wasabi, and pickled ginger on the side.   Remember, the key to making authentic international cuisine is to use fresh, quality ingredients, and to follow traditional cooking techniques and recipes. Don’t be afraid to experiment with different flavors and ingredients to make it your own. Create an authentic and flavourful cooking journey with us! Experience culinary art & baking at its finest! Join India’s Top Culinary & Baking Institute IBCA Delhi!

Uncategorized

How To Start A Career In Bakery And Confectionery?

A confectioner is a person who crafts exquisite candies. Confectioners typically create sweets, including candies, candy canes, lollipops, chocolate, chewing gum, and other treats in kitchens. Starting with the weighing, measuring, and mixing of the components using specialized equipment, confections are made.  If you decide to pursue a degree at a cooking school or college, you will study and practice cooking methods for two to four years to prepare you for the workforce. You will continue honing your abilities through on-the-job training after graduation. All things considered, confectionery is not a simple craft; it requires persistence and years of practice to be able to produce candies that are both delicious and beautiful. One of the easiest professions to enter is baking. By enrolling in a diploma, certificate, or degree program in baking, students can master the fundamentals, techniques, and abilities of baking. Candidates have the option of attending workshops, online courses, or expert-led sessions. Baking is a technical art that calls for years of practice and talent to produce amazing results. Candidates need a degree or diploma in Bakery and confectionery to become Bakers. Through internships, workshops, and baking apprenticeships, they can obtain experience. Professional bakery courses in India might be for hotels and restaurants in addition to doing freelance work and working for themselves. Candidates for this position may also apply if they have earned a certification or certificate in a relevant discipline. Some universities demand that candidates seeking master’s degrees in bakery have a high school diploma or a B.Tech or B.Sc. in a related field, such as microbiology, life sciences, botany, zoology, food science, or pharmacy. To work in recognized organizations, candidates need to have between two and three years of experience from internships and apprenticeships. Some businesses may also hire recent graduates or those with little work experience. Bakeries sell baked goods, including bread, cakes, doughnuts, pastries, pies, and eclair,s whereas confectioneries sell sweet-based things like candies and sweetmeats. This is the fundamental distinction between the two establishments. Confectioneries and bakeries might be found in the same store. Knowing how to make bread is only a small part of what it means to be a baker. Careers in baking and confectionery combine art and science. The products created from this craft include bread, cakes, pies, chocolate, and other sweet and savory baked goods. A career in Bakery And Confectionery has given rise to the confectionery and bakery industries. A variety of standards and dimensions must be kept in mind when creating the intended output, which is a combination of science and art. While the science component is the same for everyone, the creative component can vary greatly among specialists, leading to a variety of work opportunities. Here are some ideas on how to succeed in the bakery industry. Bakery and confectionery are part of the hospitality sector, and applicants are trained in these areas. They also receive training in creativity and communication. Along with practical and theoretical knowledge, you will learn mixing, heating, refrigeration, and freezing techniques in this course. You will also learn about the interactions and reactions of the ingredients used in the patisseries and confectionery processes. Depending on the course level and college for which admission is requested, there are several primary requirements for a career in patisseries and confectionery. On the other hand, a culinary arts credential frequently requires the fundamental requirements of a Class 12 diploma from an equivalent qualification with passing grades in any subject. Courses in baking and confectionery are offered at the undergraduate (UG) and graduate (PG) levels. Undergraduate patisseries and confectionery programs typically run for three years. You may be given a job as a chef, baker, food stylist, or member of a catering crew. For great outcomes, patisseries and confectionery is a technical skill that requires years of practice and talent. They can gain experience through apprenticeships, workshops, and internships with chefs. Cleanliness is also a must as basic baking may become a bit messy. People in the food business are aware of how crucial sanitation is. However, if you’ve never worked in this sector as a business owner, you might not comprehend why hygiene is so crucial. When you look at some relevant facts, it’s clear why cleanliness can make or destroy your firm. Work requires discipline and commitment. In this line of employment, adaptability is crucial because lengthy and irregular hours may be necessary. The baker will develop a fantastic reputation with all clientele if they have a decent and pleasant personality. Since cleanliness is crucial to the food business sector, it should always take precedence. People can get food-borne infections and even food poisoning when cleanliness is not ensured, but this can be avoided if cleanliness is prioritized and maintained. If clients can see how thorough you are about keeping your space clean, they will have more faith in your company. You should pay close attention to the following advice if you want to grow your consumer base and keep existing ones: Make sure the lighting in your space is adequate: The cleanliness and organization of your premises will be more apparent to clients in a well-lit food service establishment. Additionally, a well-lit facility will increase the visibility of your food, utensils, and dishes. Wash your hand: When cleanliness is a key priority, one of the most crucial things to do is to always wash your hands before making food. In order to prevent food-borne infections, you should always wash your hands before handling any food. Cleaning what you can see is important for the food company field, therefore clear away any clutter from your location. This includes anything that might be home to germs, such as dirt or food scraps. In addition to making it cleaner, this will deter pests and other disease-carrying animals from entering. Maintain cleanliness: To prevent the cross-contamination of food-borne illnesses, cleaning schedules should be established and adhered to, with cleaners cleaning various areas at various times. Conclusion  Baking is similar to art. Although it is not

Pastry Chef

5 Skills Every Pastry Chef Should Have

On a daily basis, a pastry chef does more than just combine some flour, sugar, and eggs. The most successful pastry chefs have a variety of traits and abilities that have contributed to their current level of success. The work of a pastry chef could appear glamorous and delicious to outsiders. What’s not to love about a profession where you get to design desserts, create new recipes, and taste some of the world’s best ingredients and confections? Only the greatest can survive, grow, and ascend to the top in this difficult and demanding position, which requires devotion and dedication. He requires more than just natural talent and a few hours spent in the kitchen to succeed as a chef. To master the art of perfection, apprenticeship training and experience are necessary. However, having the right credentials and abilities would enable him to take the next step in his profession. Depending on the pastry speciality they intend to follow, completing this professional training can assist aspiring pastry chefs in honing their abilities and developing their core competencies. The ability to produce recipes that delight the palate is only one aspect of the culinary expertise that a pastry chef must possess. These people require a technical comprehension of how the various components—sugars, starches, yeasts, and binders—combine to make diverse kinds of pastries. To succeed in their careers and create the delicious delicacies that people all across the world have grown to adore, these workers need to have a particular set of talents. Here are five skills that any pastry chef has to possess: Good grasp of Mise en Place The action of preparing food and dishes before a meal is served. One of the main benefits of using mise en place in the kitchen is that it saves time.You may effortlessly combine all of your cooking ingredients using mise en place. The significance of mise en place and its ability to literally determine success or failure. Highly adaptable social nature If you think a pastry chef’s work doesn’t require any encounters with customers, you couldn’t be more mistaken. A pastry chef Course needs to have polished social skills for a number of reasons in order to succeed. First, this person can be in charge of collaborating with others—or perhaps managing others in the bakery. Second, the chef can be in charge of receiving orders by phone or email and informing clients when their orders are ready. A high level of social adaptation can do wonders for your career outside of the kitchen by catapulting it to new heights.  To effectively interact with clients, pastry chefs working in retail need to be strong communicators. Those who manage personnel, such as the owner or manager of a bakery shop, value communication as well. Building trusting relationships with folks who can let you know about ingredient sales or even occasionally give you a discount as a token of their appreciation is beneficial. Then there are the customers. Even if the pastries are delicious, excellent customer service has a similar impact on repeat business. All of these situations necessitate civility, dialogue, and kindness.Keen attention to detail  To ensure that baked items have the right flavour and texture, it’s crucial to pay attention to the precise measurements of each ingredient. A pastry chef must pay close attention to detail. To ensure that baked items have the right flavour and texture, it’s crucial to pay attention to the precise measurements of each ingredient. Even the smallest mistakes, like confusing salt for sugar, can happen when there is a lack of attention to detail. As a result, it’s crucial for aspiring pastry cooks to cultivate an acute sense of detail during their pastry studies. A thorough knowledge of the fundamentals and an adventurous palate You need at the very least possess the rudimentary abilities required for that activity if you want to succeed at anything. Culinary abilities are necessary for a pastry chef. Pastry chefs not only need to know how to bake, which demands a great deal of care, but they also need to understand what flavours go well together. Naturally, you’ll want to perfect your command of the fundamentals to the highest level before you begin experimenting because solid foundational abilities will make it simpler for you to tinker with already-created dishes, which will aid in the creation of new recipes. Time management under pressure Depending on where you work, the pastry arts sector can move rather quickly. Some pastry cooks can be inclined to scrimp in order to save time, but doing so frequently results in worse products. This is why it’s crucial for pastry chefs to manage their time and properly plan out their next two or three movements in advance. Using this talent, you can improve your baking skills and discover new methods to embellish your baked items. To attract more customers and maintain interest, you might be able to develop new menu items or menu combinations. Conclusion Building trusting relationships with folks who can let you know about ingredient sales or even occasionally give you a discount as a token of their appreciation is beneficial.After that, there are the clients. Even if the pastries are good, recurring business is equally influenced by excellent customer service. Finally, the job may continue well into the night, during which you will spend the majority of your time standing in a hot kitchen. Along with the power required to mix and work with pastry, having a lot of physical endurance is important. In order to excel, a pastry chef needs more than just culinary talent; they also need physical stamina and endurance. These abilities will guarantee the chef has a successful and fruitful profession, despite the fact that the hours can be long. Finally, pastry chefs need to be able to use all of this information to produce dishes that are not only delicious but also aesthetically beautiful.

BASIC-METHODS-OF-EGGLESS-VANILLA-CAKE-AND-CHOCOLATE-CAKE
EGGLESS

BASIC METHODS OF  EGGLESS VANILLA CAKE AND CHOCOLATE CAKE

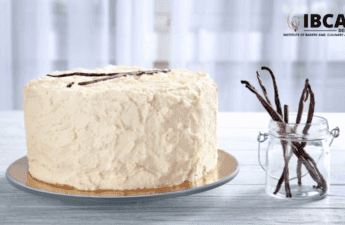
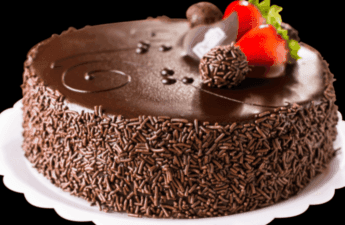
Introduction Imagine yourself wrapped up in bed on a rainy day with nowhere to go and a craving for something simple yet tasty. Since many of us are in that circumstance, when we just want to have basic eggless vanilla and eggless chocolate cake recipes again. In fact, they are ideal for practically any day. If you don’t know how to make that you can join Cake Baking Classes and then you can bake them for every occasion or just a regular day! These recipes are incredibly adaptable and may be altered in a variety of ways without changing their texture or flavour. On certain days, sometimes you adore a good, moist vanilla cake, but on others, what could be better than a slice of timeless chocolate cake? You may use these recipes in your home as a sponge for a layered cake or as a tea cake when you add almonds, chocolate chips, or anything else! Basic Tips for Eggless vanilla cake Always have your baking pan prepared with parchment paper and some oil, laid out properly, before preparing eggless vanilla cake. Do not overmix when combining the dry and wet components! Because all the air added will have been deflated, over-mixing a batter will make your cake dense. If it isn’t stated in the recipe that an ingredient should be cold or warm, make sure that all of your components are at room temperature. When making an eggless vanilla cake, always set aside the yoghurt and baking soda first because they need time to bubble up correctly before being combined with the other ingredients. Given that the eggless vanilla cake batter is on the thicker side, you can add any type of nut or dried fruit. Use a thicker yoghurt for the eggless vanilla cake rather than one that is very watery. Never overlook the crucial step of preheating your oven before baking your cakes. Although it can be frustrating to wait for the cakes to cool, let them cool completely before removing them from the cake tins for clean sides. If you are keenly interested in baking but don’t know how and where to start, you can enrol in Cake Baking Classes for practical learning experience. Basic Tips for Eggless Chocolate Cake In order to ensure proper aeration, the dry ingredients should always be sifted in, especially in this recipe given the lumpy cocoa powder. Using coffee powder is crucial in this recipe since it helps to accentuate the necessary chocolate taste without really adding any distinct coffee flavour to the cake. Don’t skip the salt; it really makes a difference in the way the flavours are balanced. A baking pan should always be prepared and your oven should always be preheated. Don’t overmix if you want your eggless chocolate cake to be lighter. DIFFERENCE BETWEEN THE RECIPES FOR EGGLESS VANILLA CAKE AND CHOCOLATE CAKE Don’t be surprised if you encounter this issue when preparing both the eggless vanilla cake and the chocolate cake because the batter for the latter is thicker in this recipe. Due to the addition of cocoa powder, the texture of the eggless vanilla cake is moister than the chocolate cake. But in terms of their flavours, both are moist. Compared to eggless vanilla cake, eggless chocolate cake is on the lighter side. The flavours are obviously distinct because we add vanilla extract to vanilla cake, where high-quality vanilla extract is crucial. The use of coffee powder gives the eggless chocolate cake an exceptionally strong chocolate flavour. If you enjoy dry cakes and looking for some inspiration and guidance you can join Cake Baking Classes. EGGLESS VANILLA CAKE & CHOCOLATE CAKE RECIPE ●     Vanilla and chocolate cakes without eggs ●     Cake ingredients for vanilla ●     All-purpose flour, 2 + 1/4 (270g) ●     Baking powder, 1 1/2 teaspoons (6g) ●     yoghurt, 1 1/2 cups (428 g) ●     Baking soda, 1/2 teaspoon (2g) ●     1 + ¼ cup (280g) (280g) Vegetable oil and 3/4 cup (180 ml) caster sugar ●     7 cc (1 1/2 teaspoon) of vanilla extract ●     Regarding chocolate cake ●     ¾ cup (90g) (90g) cocoa butter ●     boiling water, 1/4 cup (180 ml) ●     12g of coffee powder per tbsp ●     1 + ½ cup (300g) (300g) Vegetable oil and 3/4 cup (180 ml) caster sugar ●     1 tsp or 5 millilitres of vanilla extract ●     yoghurt, 1 cup (285 g) ●     285g (1+1/2 cup) of flour ●     4 grammes of baking powder per teaspoon ●     Baking soda, 1/2 teaspoon (3g) ●     A dash of salt Instructions ●     Set the oven to 180°C and use parchment paper to line an 8-inch round cake pan. ●     To prepare the vanilla cake, combine the yoghurt and baking soda in a basin, stir it briefly, and then wait for it to bubble up. ●     All-purpose flour and baking powder should be combined in a separate basin and set aside. ●     Once the yoghurt mixture has foamed, quickly combine the caster sugar and oil with it. ●     Including vanilla extract ●     Gently incorporate the dry ingredients into the wet ones until there are no noticeable flour pockets left. ●     At this point, avoid mixing too much.Any type of nut or dried fruit can now be included if you so choose. ●     Fill the lined cake pan with the batter, and bake it for 30-35 minutes at 180°C, or until a spear comes out clean. ●     Remove the cake from the tin after allowing it to cool completely. Enjoy! ●     To create the chocolate cake, preheat the oven to 180°C and line an 8-inch pan with parchment paper. ●     Add boiling water and coffee powder to a small bowl and stir well. ●     Add cocoa powder to a different bowl. Pour the coffee mixture over it, then combine everything to create a slurry.Using a balloon whisk, blend yoghurt, vegetable oil, and caster sugar in the same basin. ●     Next, add all the dry ingredients to the bowl, including maida, baking powder, baking soda, and a dash

Bakery Institute

What is the best way to prep your cake pan to prevent sticking?

Introduction It’s not unusual to occasionally wish to bake cakes as a delightful treat for the whole family. Your cakes are probably quite popular, but it might be a pain if you can’t get the cake out of the pan. You might be wondering what you’re doing wrong if your cake just appears to be clinging to the pan. Turning your cake pan over the cooling rack while you wait to see if the cake comes out intact or sticks part way out and crumbles is one of the most stressful parts of baking. Will today’s bake be ecstasy or suffering? You can prevent this from happening to you by doing a number of things. We experimented with a few techniques to prevent a messy end and discovered the ideal way to line your pan for a stick-free guarantee. To learn everything there is to know about preventing cake from sticking to the pan, join Baking classes in Delhi. You’ll have a lot more faith in your ability to make cakes that everyone can easily appreciate. Parchment + non stick pan spray. The baking expert’s best buddy is parchment paper with a silicone coating. Apply non-stick parchment to the pan’s bottom, and then spray nonstick pan spray on the sides. If you choose a “belt and suspenders” strategy, feel free to spray the parchment as well as the bottom of the pan before adding it. This is a method that some people advocate. If your cake was baked on paper, it will easily peel off the warm cake’s bottom and slide directly out of the turned-over pan onto the cooling rack. For baking in square or rectangular pans, use parchment half-sheets that have been trimmed to size. Parchment rounds are convenient for round pans. For cakes with sticky fillings, such as meltable chocolate chips, caramel pieces, fresh or dried fruit, or anything else, we highly advise using parchment paper and pan spray. Cake goop Homemade “cake goop,” as it is known to seasoned cake bakers everywhere, is a fantastic substitute if you decide against using paper. Goop is created by combining equal volumes of vegetable shortening, flour, and vegetable oil. It is then easily brushed with a pastry brush onto your pans (or rubbed on with a paper towel). Create a batch* and place it in the refrigerator; even when cold, it will remain spreadable and ready to use. If you’re tired of trying different methods everytime but still failing miserably, you need to join Baking classes in Delhi. Vegetable shortening Alone or after using the aforementioned alternatives. Stick with the usual approach of preparing a cake pan if you’re completely satisfied with it, however you might want to experiment with using anything other than flour for interest’s sake. The drawback of shortening is that occasionally, especially if it’s not super-fresh, you could taste oily. pan spray dusted with confectioners’ sugar Why not sweeten your pan coating without the grainy texture of granulated sugar? Although at the time it seemed like a wonderful idea, the cornstarch in the sugar allegedly combined with the liquid in the cake mixture and turned into glue! Additionally, it will be advantageous to lightly dust the bottom of your pan with flour. Directly over the butter or vegetable shortening that you’re using to oil the pan, add a small amount of flour. For this to work out well, the bottom of the pan should ideally be coated with flour to a depth of about an inch. If you want to make sure that your cake will come out of the pan easily, don’t omit this step. Flouring the bottom of the pan doesn’t take very long, and if you’re baking a cake, you almost certainly have extra flour. Your cake will come out of the pan very easily once it has cooled off after being taken out of the oven, so you’ll be happy you took the time to do this. Non Stick pan without any prep Of course, there are some people who adore using non-stick cake pans because of how simple they are to use. But in Baking classes in Delhi you’ll get to learn that you always need to prepare your pan even if it is non sticky. This particular non-stick coating on the cake pans is designed to keep items from adhering to them. These pans ought to make it simpler for you to remove cakes from them without any sticking. Why should I coat my nonstick pan with anything when it is already nonstick? Because cake batter is naturally sticky, it sticks to the pan’s surface while baking. Even a nonstick pan can only withstand this to a certain extent. Avoid being obstinate: even your nonstick cake pan should be ready. If you bake a cake in a nonstick pan, whether it be a 9″ round, 8″ square, Bundt, springform, or any other shape, and you’ve prepared the pan with pan spray, wash the pan in warm, soapy water as soon as you remove the cake, while it’s still warm. As nonstick pans cool, pan spray adheres to them, creating a sticky residue that, paradoxically, eliminates the non-stick properties of the pan over time. Cleaning up as you go will save you a lot of time trying to remove that stickiness without ruining the pan’s surface. Conclusion It’s wonderful to be able to remove the cake from its pan without much trouble because your cake has the power to unite the entire family. You’ll find it a lot simpler than previously if you go for the Baking classes in Delhi. It’s really simple to follow the instructions given above, and you’ll probably remember the steps moving forward. After a while, doing these things while baking a cake becomes automatic. Every cake you chose to create will be considerably simpler to remove from the pan.

Baking Courses

BEST 4 INGREDIENTS FOR CHOCOLATE CAKE

Oreos are the biscuit you would choose if you had to choose one to eat every day for the rest of your life. Not the best, are they? Creamy goodness between two chocolate cookies. Ah! This is a win for everyone. So what could be better than turning your favourite biscuits into a dessert? Although it seems spectacular, chocolate lava cake is actually very easy to make, you can also learn about this recipe by enrolling in Professional Baking Classes. They only take a single bowl and a whisk to prepare, and they are done in less than ten minutes. Prepare the batter in advance and chill it before baking your Molten Lava Cakes for stress-free entertaining. These chocolate lava cakes always turn out perfectly, dripping with a lovely stream of smooth chocolate that you’ll want to lick off the plate. You may have tried this in one of the restaurants in your neighbourhood, but have you ever baked it at home? If not, you’ve come to the right place because this article will show you how to make a delicious and fluffy chocolate lava cake using just a few basic ingredients. Let’s get right to the list of ingredients for chocolate lava cake. The recipe for this 4-ingredient chocolate lava cake couldn’t be simpler or more delectable. You won’t just eat one bite, for sure. Molten chocolate cakes, also referred to as choco lava cake in the traditional sense, are warm, individual-sized chocolate cakes with oozing centres. Most recipes simply call for underbaking chocolate cake batter, leaving the inside as raw batter that pours out like a liquid.  1. OREO BISCUITS Oreos are the key component of this recipe because it is flourless. Any flavour that you find in the store is acceptable. The best-tasting cakes, though, will be plain or chocolate. But feel free to have fun if you want to!  2. HOT MILK The oreos should be baked with hot milk to give them a batter-like consistency. The oreos will melt as a result, and the batter will be silky and smooth with chocolate flavour! Any milk, whole or half-cream, may be used. You can also substitute your preferred milk, such as soy or almond.  3. BAKING SODA In order to give the four ingredient chocolate lava cake a cakey texture that is to die for, since this recipe does not call for flour or eggs, you can add baking soda. Additionally, it aids in giving the cake a nice framework and height.  4.  CHOCOLATE CUBES You can add a few chocolate cubes for a gooey, chocolaty centre. The cake’s lava dripping from it is actually the best part. Ice cream and warm chocolate on a plate really do feel like heaven. HOW TO MAKE THIS 4-INGREDIENT CHOCOLATA CAKE: TIPS AND TRICKS It’s easy to make, takes little time, and always has a moist, fluffy texture. Best bakery classes in Delhi can help with this recipe. The type of baking equipment you employ greatly influences the final product! To ensure the quality of your baked goods, You should use high-quality mixing bowls and other tools. Many people like to use glass bowls that are microwave and oven safe to combine all of my ingredients because they are so simple to handle and clean, making baking completely hassle-free. A moist and fluffy chocolate cake can be made using a few secret techniques. First of all, it’s crucial to have the proper proportion of dry to wet ingredients, so we always advise measuring your ingredients when baking. To avoid the cake crumbling, there should be more wet ingredients than dry. 1. Adhere to the recipe This seems pretty obvious, no? The most significant cake baking advice you’ll ever hear or read is to always follow the recipe. It is also the most disregarded. On the basis of what we have, we frequently replace ingredients in recipes. Ingredients are required for a reason, and a cake will typically fail because the recipe wasn’t followed exactly. It is always advised to stick to a recipe the first time you make it before making adjustments the next time. 2. Use the proper measurement This advice also seems obvious, but it’s the area where we slip up the most frequently. One incorrect tablespoon of sugar could spell the difference between a recipe’s success and failure. It’s crucial to measure ingredients accurately. Baking is not very tolerant. Better baking results are guaranteed if you know the proper way to measure a particular ingredient. To learn more about baking and appropriate measuring techniques, enrol in professional baking classes. 3. Avoid over- and under-mixing Whether a recipe instructs you to whisk the cake batter together or use an electric mixer, make sure you only mix the ingredients together *just* until they are combined. Because you’re deflating all the air and over-developing the gluten, over-mixing batter, whether it’s for cakes, cupcakes, breads, muffins, etc., results in a baked good with a tough texture. Don’t switch on the mixer and then depart! Don’t undermix, either. It goes without saying that we want to combine all the ingredients. 4. Bounce-Back Test A toothpick can be used to test the doneness of a cake. If a toothpick inserted into the centre of the cake comes out clean, the cake is fully cooked. Additionally, there’s no need to waste time looking around for a toothpick: Either remove the cake from the oven or keep it there. Apply light pressure to the cake. The cake is finished when it completely recovers. If the cake has a dent from your finger, it will take longer. so simple you can always do this. You can apply this simple technique to muffins and cupcakes as well. Conclusion You’ll be amazed at how easy it is to make molten chocolate lava cakes at home. Because they are purposefully slightly undercooked, they make the ideal individual desserts with a gooey, melty chocolate centre that oozes out when you cut into them. These molten chocolate cakes are

Uncategorized

Five Tips for Women in the Culinary Arts

Men used to be the ones who did most of the cooking, but these days, women are becoming more and more important in the kitchen. Over the past few years, the number of male and female chefs has changed. Now, more women than men work in the kitchen. As these women get more attention, women that are more successful are making their mark in the hospitality industry and becoming role models for other women chefs. Male chefs are less likely to be rude to female chefs of today’s generation than they were in the past. Their struggles come from inside as they try to balance being a chef, a mother, and a person who wants to get better and be recognized. For single moms who work in restaurants, balancing family responsibilities with the job’s long hours requires a robust support system at home. In a field dominated by men, only 18.5% of professional chefs are women right now. There are more women with diplomas in culinary arts today than ever before. As women take on more leadership roles in the kitchen, here are some tips for them. Set Boundaries Set clear rules about respect and behaviour right from the start. Know where you stand. Make it clear how far jokes can go, but do it healthily and nicely. Do not believe what people say about you; do not be afraid to speak up for yourself. Even though it might not make sense, focusing only on speed can make you a slower cook. If you hurry while deveining shrimp or shucking corn, you might make a mess and have to do the task again. Not only does this waste time, but it also causes ingredients to waste. By putting technique first and speed second, you can become a precise and quick cook. Bring Your Unique Qualities To The Table. In the kitchen, it helps to be a woman. Do not try to be a man in disguise; diversity is critical. Women usually have a different sense of taste, harmony, design, and how things look; they do things differently. Use these qualities to help everyone in your brigade shine. Use your point of view, and do not be afraid to break the rules. Be Part of the Change. Thoughts are changing in the kitchen. We need to keep telling the stories of success and making the profession look good as a whole. Try new things and think outside the box, but remember the basics of cooking. In terms of products and ingredients, be true to who you are. Dare to be different and stand out. Several women who have pursued diplomas in culinary arts have gained significant experience. By knowing they are kitchen experts, more women will get the attention they deserve in this field. Think About the Future Be local, ethical, and sustainable. How we make things affects the planet. Learn how the things you eat affect everything else. A fairer kitchen will be good for your team, your customers, and your business. When you go to culinary school, you can network with Chef Instructors, school staff, past graduates, and future graduates. Chefs need to be proactive if they want to make the most of these chances to network. Finding time for it in your busy life might be challenging, but it is worth it. The most famous chefs did not become famous by spending all day in their kitchens. Get A Culinary Education. Those who follow their dreams will have a bright future. It’s essential for women in professional kitchens to learn about the business side of running a kitchen, grow as people, and keep exploring, learning, and coming up with new ideas. Look at a perfectly seared steak with chimichurri sauce or a salad with a balance of flavours, textures, and colours. You can see that cooking is a complex art. However, most professional cooks use the same set of core skills every day. Work on your basic skills and learn some new tips and tricks. You can do these repetitive tasks faster, making you faster and more efficient overall. As the saying goes, you have to learn to walk before you can run, and the same is true in the kitchen. Before you can speed through tasks and do them well simultaneously, you need to know how to do them at a slower pace. Culinary school can teach you the right way to cook and put you in touch with mentors who can give you tips from their years of professional cooking. In addition, going to a program for culinary arts can give you many chances to practice your skills, which may help you get faster. Reviewers and writers of food come from many different places. Some have gone to cooking school, some are trained journalists, and some have just written and eaten so much that they can excitingly talk about food. To start writing, you can be a familiar journalist. You can have a few clips or credits.

IBPA Image
Uncategorized

Can I Get A Job With A Diploma In Culinary Arts?

“Culinary arts” refers to the practice of cooking. Students learn how to efficiently and aesthetically prepare, cook, and present food and meals in a culinary arts course. Enrolling in culinary arts classes is the best move for people who are interested in a career in food and beverage management, kitchen management, or other hospitality and food-related job profiles. Candidates who enroll in culinary arts programs gain the operational, technical, and managerial abilities required to succeed in the culinary branch of the hospitality industry. Aspirants have access to culinary arts courses at both the undergraduate and graduate levels. Most of the undergraduate culinary arts programs last three years. Popular UG level courses in culinary arts include the Bachelors in Hospitality Management with a Culinary Specialization, the BVoc in Bakery and Cookery, the BA in Culinary Arts, the Bachelor of Catering Technology and Culinary Arts, the BVoc in Culinary Operations, the BSc in Culinary Science, the BHM with Culinary Arts, the BA in International Culinary Arts, etc. Candidates may also sign up for culinary arts courses at the PG level. Most culinary arts programs at the PG level last three years. In addition to these programs, students interested in the culinary arts can also enroll in diploma programs, including the Post Graduate Diploma in Dietetics and Hospital Food Service, the Diploma in Culinary Arts of Italian Cuisine, the Post Graduate Diploma in Bakery and Confectionery, the Diploma in Food and Beverage Service (undergraduate course), the Post Graduate Diploma in Bakery Science and Technology, the Diploma in Hotel Management (Food and Beverage Service), and the Diploma in Culinary Arts. The numerous hospitality industries that require chefs and cooks are drawn from the culinary industry. It’s possible that you’ll be able to find work right away, but you shouldn’t plan on making a lot of money right away because entry-level jobs always require a lot of training and experience. Numerous settings, such as hotels, restaurants, catering services, large-scale kitchen operations, and specialty coffee shops, offer numerous opportunities for employment as a chef. After receiving your diploma in culinary arts, you must immediately get to work and learn everything you can in order to establish your career and reputation in the food industry. Once you start doing that, learning and working in the best kitchens should take precedence over seeking out higher paying jobs. Due to the fact that you’ll start earning more money once you’ve had a long period of training and experience. Your craft will eventually be refined or taught in a better setting with wealthier kitchens. What types of jobs are available to you if you have a diploma in culinary arts? Some positions requiring a culinary degree are entry-level, while others might call for a few years of experience. These 11 positions are available to those with a diploma in culinary arts. Pastry chef A talented cook with a focus on creating the breads and desserts found on menus is known as a pastry chef. They collaborate with other chefs to develop a diverse menu. A pastry chef can work for bakeries, catering businesses, and traditional restaurants. Nutritionist  A nutritionist is a person who focuses on how food can energize and fuel the body for a healthy lifestyle. They can closely collaborate with patients to identify their nutritional requirements and create a diet plan that will be advantageous to them. Some nutritionists develop menus for clients that are nourishing and promote healthy eating in places like schools or hospitals. Culinary Specialist  A US military member who helps with food service for personnel staying in facilities or traveling on ships is known as a culinary specialist. Meals are planned, inventories are checked, menus are designed and improved, and the staff is arranged for serving. In order for food preparation to take place there, the culinary expert must also ensure that the area is tidy and organized. Caterer  A caterer is someone who regularly serves food and dessert to large crowds of guests at events. Caterers are frequently employed for special events like weddings, birthday celebrations, movie premieres, and anniversaries. To create a menu and a plan for preparing, delivering, and serving food at the event, they consult with their clients. Math is used by caterers to develop and estimate service costs, schedule the purchases of ingredients, and guarantee that there is enough food for the number of guests at each event. Restaurant Manager  The day-to-day management of a restaurant falls to the restaurant managers. They implement systems for food preparation and service that reduce wait times and facilitate communication, and they are in charge of the efficiency and output of the staff. A restaurant manager may be in charge of employee hiring and firing, performance reviews, compliance with safety and hygiene regulations, team schedules, ingredient inventories, and interactions with the restaurant’s owner. Sous Chef  The sous chef, a culinary expert who oversees other cooks and reports to the executive chef or head chef, depends on how the kitchen is set up. They frequently collaborate closely with the executive chef to create menus and handle problems in the kitchen, where they oversee many of its operations. A sous chef may be responsible for writing menus, enforcing policies, monitoring kitchen inventory, inspecting work areas for cleanliness, and creating staff schedules. Food service director  A food service director is someone who oversees food production and delivery. They frequently work for establishments that serve a sizable clientele, such as hospitals, hotels, prisons, and camps. The director of food service deals with vendors and suppliers, monitors distribution processes, and ensures that the kitchens are kept tidy and clean. Executive chef  The executive chef is always in charge of the quality of the food that the kitchen produces. He or she is the highest-ranking worker in the kitchen. Executive chefs work with other chefs to create and enhance menus, purchase ingredients and equipment, and communicate with the media. An executive chef manages a group of sous chefs and establishes the atmosphere and culture in the kitchen. Food

Scroll to Top
Call Now Button