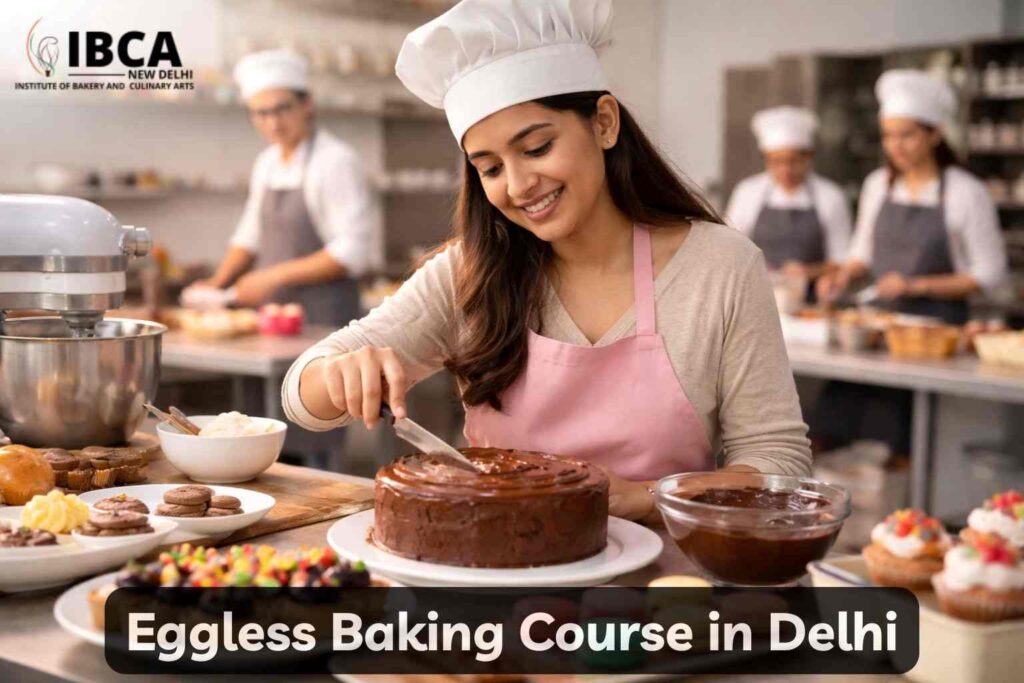
bakery course in delhi

Advanced Diploma in Bakery
Baking Courses, Diploma in Pastry and Bakery

Advanced Diploma in Bakery – Syllabus, Duration & Career Scope

Now, students start to look at diverse sectors as opportunities, and now they have started looking at their cooking hobbies as professions. To get a professional status, the hobby needs to be pursued at an advanced level. So In Advanced Bakery Diploma & Kitchen Management Diploma degree is given by Chef IBCA, which provides professional status. For those who are interested in professional baking and culinary arts thode one needs to take an Advanced Diploma in Bakery & Confectionery. This course teaches various techniques, ingredients, and pastry art, providing advanced skills in artisan bread-making, chocolate tempering, sugar art, cake decoration, and face sculpting. All this training aims for professional status, skill enhancement, and diverse career opportunities for students who are genuinely interested in becoming professional masters in Bakery. What Is an Advanced Diploma in Bakery? Advanced Diploma in Bakery. This is a professional-level training of 2 years, in which detailed skills and techniques are given, like: Artisan bread making, pastry art, cake decoration skills, chocolate flavouring, sugar art, and bakery management. It is beyond the foundation level of baking skills. Basic Diploma: This level of course provides foundational techniques and recipes for kitchen beginners. This degree does not help to give professional status; only basic knowledge, like plating, bread making, cutting, and chopping techniques, are taught. Career opportunities are not at an advanced level. Certificate – Advanced Level Training. This involves different kinds of decoration, techniques of cutting pastry, etc., and skills developed at a professional level. This gives certification to get professional recognition, which helps to open different career opportunities, like entrepreneurs of cafes and bakeries, or collaborating with bakery advertisers. The student who wants to get a professional status needs to be truly happy with their chosen path. The person who wants to make cakes is constantly making them using professional-level techniques. I want to be a pastry chef. Also Read: How To Start A Career In Bakery And Confectionery? Course Duration and Eligibility Advanced Course: The duration of the Advanced Bakery Diploma course is typically 12-18 months. In the 6th month, students begin understanding the basic aspects of bakery and an internship of 6 months. This training provides professional-level skills, qualifying students to become a chef at IBCA. Within these 12 months, the student will achieve an advanced-level professional chef status in cake making, bakery, and decorative art. Eligibility: Students who have completed their 12th grade from any course, and professionals who work in bakery and kitchen management, are eligible to get advanced level training and develop their skills. Also Read: Baking Courses After 12th – Career, Scope & More Admission: Admission for interested individuals is open. Hurry up and get registered! Seats for admission are limited, and spots are filling quickly. Registration dates will be announced. Slots will close soon, so hurry up to make your hobby a profession.  Detailed Syllabus Overview The syllabus of Advanced Bakery is divided into sections, which cover between 1 to 1 1/2 years, with advanced-level training in cake making. Module 1: Advanced Bread & Artisanal Techniques Module 2: Pastry & Dessert Art Module 3: Chocolate & Sugar Art Techniques Module 4: Cake Design & Plated Desserts Module 5: Food Safety & Kitchen Management Hands-On Training & Facilities at Chef IBCA In the Advanced Bakery Diploma Course, professional-level training is provided. At IBCA, students gain lab training where modern ovens, mixers, and confectionery tools are available to knead dough mechanically. The students are taught how to use machines to get perfect dough for bakeries. The focus is on maintaining the kitchen, how to maintain cleanliness, the plating system, and proper smoothing of cakes. In the Advanced Bakery Diploma course of Chef IBCA, students receive training and guidance from 10-12 professional chefs. These chefs have extensive experience, having worked in top-tier restaurants and 5-star hotels. These chefs provide training on how to work with precision. They teach how to prepare desserts and how to perfectly design the plate. Chefs impart advanced-level knowledge on how to use baking techniques to achieve perfect cooking and bakery results. The students also gain experience in looking after and working in the industry. They learn: Career Opportunities After Completion After completion of the Advanced Diploma course in Bakery, a student will not only gain professional skills but also secure placement with top bakeries, hotels, and companies through Chef IBCA’s various connections. Some placements through Chef IBCA are at an international level where recruitment occurs in foreign countries. The salary potential from these regions is also very high. Students have received packages ranging from 7 lakhs to 50 lakhs. Chef IBCA has partnered with top brands like Baker’s Choice Cake and Candy Company, for which students can make new, innovative products and earn a high salary in return. Including these students after completion of the Advanced Diploma in Bakery course, these individuals can also turn towards entrepreneurship, in which they can start their own bakery and bake different types of cakes. The individual can be an innovative product developer, get a patent for their innovation, and earn from it. Also Read: Is a Diploma in Pastry and Bakery Worth It in 2025? Why Choose Chef IBCA for Your Advanced Diploma Chef IBCA is considered the best choice for an Advanced Diploma in Bakery. This institution helps students develop professional skills through hands-on training from professional chefs who have 10-15 years of experience. At Chef IBCA, students not only receive certification of professional status but also get placements in different sectors, which ensures career security. These are some of the features that make Chef IBCA the best choice. 1. Their recruitment given at the international standard curriculum gives students the opportunity to earn high salaries and showcase their skills in foreign countries. 2. There is 100% internship assistance given to students so they gain proper working experience. 3. A certificate is provided upon completion of the course, which has global recognition. 4. Trained professionals provide training to the students. Rajesh Chauhan got recruited in Hong Kong by a

bakery marketing ideas to sweeten your sales
Bakery Business, Bakery Institute

10 Irresistible Bakery Marketing Ideas to Sweeten Your Sales

Just picture your bakery full of customers, many orders online, and everyone talking about your brand. Sounds like a dream? Well, it’s realistic with the right Bakery Marketing strategy. Whether you want to reach a wider audience or simply hope for that extra bit of inspiration, we outline the key strategies that can help turn your humble bakery into an affordable community hub, from knowing and targeting your audience to properly utilizing things online. The first thing you need to consider is the customer journey from scratch. How could you turn your bakery from a place to buy bread and pastries into an exciting destination? What is unique about your bakery? These are the questions every bakery owner should carry with them. By having the proper online presence a bakery can bring in local customers as well as target out-of-town customers looking for something new and tasty.  10 Irresistible Bakery Marketing Ideas Check out these 10 simple yet powerful ideas to help your bakery stand out and bring in more happy customers. 1. Focus on Your Target Audience At the heart of every great marketing strategy is an understanding of who your customers are. Or are young professionals in need of convenient, delicious snacks? Or families looking for a birthday cake? Knowing your audience will allow you to make products and market them specifically aimed at meeting their needs. Survey your audience, analyze sales metrics, and speak to people to get feedback. 2. Market Research and Analysis Market Research Regularly conducting market research will help you stay one or possibly more steps ahead of your competition. Look at baking industry trends, investigate your competition, and find an unserviced gap in the market where your bakery can make money. This will keep you in touch with your end users and evolve yourself to changing consumer needs. 3. Development and Innovation Keep it Innovative Innovation also maintains the development of new products and the improvement of existing ones. Included in the above is looking at seasonal items, one-offs as well as collaborations with other local businesses that could build necessary buzz. Ask for feedback from your customers and be willing to try some new flavors or recipes. 4. Follow Different Promotional Strategies The below bullet list can merely help you a lot in increasing your sales with the promotional strategies that work. A hybrid of online and offline campaigns, including social media promotion, email marketing blasts, loyalty programs, and exclusive discount offers. Hold events, such as baking workshops or seasonal contests to connect with your local community and make lasting memories for customers. 5. Setup Proper Online Store : Bakery Marketing Nowadays, having an online store is a necessity. Create a website where customers can make orders, even from home. You can work with delivery services or deliver orders to customers by yourself. Announce the launch of online orders through your social networks and mail-outs. As a promotion, give free delivery on the first order or a discount on the second if the order was placed via a link. Before setting up a proper store you should also be aware of Best bakery courses in Delhi so that you can upgrade your knowledge about baking. 6. Customer Feedback and Review Customer feedback is gold dust for taking your bakery to the next level and facilitating better customer satisfaction. Prompt customers to write reviews in places such as Google, Yelp, and your Facebook page. Take all feedback, and try to reply to both good and negative reviews so they feel you care about their opinion and that in fact, your service is what it claims to be. Share positive reviews of your loyal customers on site or social media, and use a referral program to reward them. 7.  Try Multiple Distribution Channels Explore multiple distribution channels to reach the most people. Aside from your brick-and-mortar bakery, you can also get these goods to local farmers’ markets partner with a coffee shop/restaurant, or set up an event booth at community events. By Scaling your footprint, you will expand the reach of your brand to capture new customers. Finally, online sales are important to create an e-commerce platform to attract customers who like buying from home.  8. Social Media Engagement for Bakery Marketing Use social media as your secret weapon to reach out and show images of what delicious products you offer at the bakery. You want to be sharing images of your products, the behind-the-scenes, and interacting with people via comments on the posts so make sure you have a constant stream of high-quality photos up at any given time 9. Do Partnerships and Collaborations Teaming up with other local businesses boosts your presence and lures in fresh customers. Think about partnering with a coffee shop, restaurant, or another local artisan. Joint Promotions, Co-branded Products, and Events could generate a lot of buzz and benefit both the businesses involved. For instance, a cafe could sell your baked goods with their coffees and it could create more awareness and people will know more about it. Also Read: Ultimate Guide to Start a Bakery Business & Run It Profitably Another option is to team up with a local non-food business like one or more florists, gift shops, etc. Pairing your baked goods with another product for a special occasion, whether it be birthdays, anniversaries or the holidays can turn what you offer into one-off but prevalent sold-on gift solutions for those looking to complete their ideal present. Conclusion Using the above-mentioned marketing strategies, you can add sugar to your sales and make customers stick like glue at your bakery. Every strategy we have mentioned earlier is a piece of the puzzle with several elements that help shape an ideal marketing plan. Innovate your products, have clear targets, and also work on building a strong bakery brand so that you stand out. Join any of the baking courses in Delhi if you wish to learn baking and make a great career in baking. You will get

classic cheesecake a timeless dessert for any occasion
Bakery Business, Baking Institute

Classic Cheesecake: A Timeless Dessert for Any Occasion

Everyone loves a traditional cheesecake. It is a fail-safe dessert that takes its place at the head of festive celebrations, cozy family get-togethers, and late-night sweet cravings everywhere. It is wonderful tangy-flavored, creamy texture not only fills the pleasure of baking but also proves that good food makes all moments so delightful. Let’s know more about cheesecakes in this blog post. Why Classic Cheesecake is Beloved? Traditional cheesecake is a showstopper dessert for good reason. Unique in its delicate, velvet texture that glides like silk across the tongue and melts to a lightly tangy flavor, an irresistible delight. This simple dessert is renowned for its ingenuity and versatility in taking on a variety of toppings and flavors – from bright fruit coulis to chocolate drizzles. The classic cheesecake is a constantly evolving dessert and the ability to please various fussy eaters has made it one of those desserts that will always be on someone’s favorite list all over the world. What Makes the Ultimate Classic Cheesecake? The ultimate classic cheesecake walks the line between creamy and firm. The buttery graham cracker crumbs or flaky pastry crust will shatter against the fork, building a foundation for what follows—the filling. The texture here is soft and luxurious, with a silken mixture of cream cheese, sugar, eggs & their yolks which give such wonderful flavor, and just the slightest hint of vanilla. The secret to its greatness is in part due to the high-quality ingredients used—the fresh cream cheese, farm-fresh eggs, and top-shelf vanilla extract—but also dealing with each step of preparation meticulously right from mixing to baking. Ingredients Needed to Make Classic Cheesecake For the Crust: For the best crust that also lends itself to a traditional cheesecake, blend 1½ cups graham cracker crumbs with ¼ cup granulated sugar and mix in half a stick of melted unsalted butter. This buttery crust forms the base of your cheesecake, creating a slightly crunchy foundation fir perfectly with that dense creamy filling. The graham cracker crumbs, which are sweetened with some sugar and held together by the melted butter form a crunchy contrast to the silky smooth cheesecake filling that amps every single bite up into an explosion of flavor chiming in there. For the Fillings The filling calls for 4 (8-ounce) packages of cream cheese, 1 cup granulated sugar, ¼ teaspoon vanilla extract, Large eggs: sour crèméì and all-purpose flour. The result of this carefully curated mixture is the smooth, velvety texture and a perfect mix between sweetness and tanginess in every slice of your best bet classic cheesecake. Equipment Needed For making a traditional cheesecake, you require different equipment such as a 9-inch springform pan that plays an essential role in baking and helps to remove the cooked cake easily. You need these mixing bowls to mix up the ingredients, and an electric mixer will give you a smooth batter. Use a rubber spatula to help get the sides of your bowl fully mixed. Preparation Preheat Your Oven –  Turn it on to 325°F (160°C). Prepare the crust: Mix graham cracker crumbs, sugar, and melted butter in a bowl. Take out the mixture 5 mins before and firmly press it into a spring form pan at an even level. Chill, whilst preparing the filling. Make the filling: Blend cream cheese in a large mixing bowl until smooth Slowly add in the sugar and vanilla, then beat until it comes together. Add the eggs 1 at a time and beat well after each addition. Combine with Sour cream, flour, and lemon juice until smooth Also Read: Best Substitutes For Egg In Cheesecake Baking Process Pour filling over the entire crust – Spread it evenly with a spatula. Water bath: Cover the exterior of the springform pan (bottom and about an inch up sides) with aluminum foil to prevent seepage. Put the pan inside a roasting sheet and fill it with water, halfway up the sides of your springform pan. Bake: In the preheated oven, place the roasting pan with the cheesecake and bake for 1 hour to 1 hour, or until the center is almost set but still a little jiggly. Cooling and Refrigeration Serving It is a rather beautiful thing, serving up the classic cheesecake. Gently remove the cheesecake from its springform pan, removing no slice will fail to be perfect. Slice with a sharp knife in between wipes of the blade for perfect cubes that reveal all its soft goodness. This dessert is a crowd-pleaser served unadorned–or topped with your favorite toppings like fresh berries, hot fudge sauce, or caramel. Slice after slice and layer upon layer usher forth an opus of flavors and components that conspire to be among the highlights of every meal or celebration. Storage and Shelf Life Keep your classic cheesecake in an airtight container inside the fridge for the best storage and shelf life. It can keep for up to 5 days, still creamy and tasty. If you plan to freeze the leftover slices, wrap them in plastic and then stuff them into a freezer-safe bag. With proper wrapping, we have frozen cheesecakes for 3 months before eating them and they’ve been perfect when thawed with no loss of flavor or texture. To serve, mimic my mistake and unwrap the thawed cheesecake overnight in the refrigerator. These best practices will help you store your cheesecake in such a way that it remains delicious long after the first bite is had, so you can enjoy it to satiate your desire down the road. Variations and Customizations For Fruit Topping: Spread a layer of fruit desired between preserves and cheesecake on top. Chocolate Swirl: Mix melted chocolate into the batter to create a swirl pattern. Nut Crust: Use crushed nuts instead of graham cracker crumbs for something different. Troubleshooting Cracks on top: To avoid this, do not overbake and let the cheesecake cool slowly in an oven. Lump Batter: Make sure your cream cheese is fully softened before mixing. Crushed crust: Pack the heck out of your

how to make homemade puff pastry a step-by-step guide
Bakery Business, Pastry Chef

How to Make Homemade Puff Pastry: A Step-by-Step Guide

A puff pastry is a thin, flaky pastry with a light, airy consistency and a buttery flavor. It’s a rich dough that’s utilized in both sweet and savory baking recipes, ranging from buttery croissants and pastries to tarts and meat pies. Puff is often readily available in shops, so this puff pastry method can give you more control over the components and a superior final product. In this specific puff pastry recipe guide, simple step-by-step instructions will assist even beginners in achieving excellent results. What is a Puff Pastry? A puff pastry consists of various layers of dough and butter that are rolled and baked. The finished structure becomes puffed and airy with a combination of several layers. As mentioned above, the dough contains a high proportion of butter, which makes it airy and partially soluble when baked. As such, the puff pastry is a stable and commonly used pastry in professional kitchens as well as household settings. The peculiarity of baking this dough is that it does not contain any active raisins or soda. The layers puff up due to the steam that butter creates when it mixes with the dough bars. As a result, a baker must have good performance skills in order to succeed at this type of pastry. How to Do Puff Pastry at Home Puff pastry made from scratch involves multiple steps, including considerable effort. However, with due diligence and attentiveness to details, anyone can learn how to do it. Below is a step-by-step guide on how to do puff pastry. Recipe: Step 1: Make a Flaky, Buttery Dough Ingredients: Step 2: Compile Everything Preparing the Work Surface: Initial roll-out 1. Roll the dough: Roll out the dough into a thin rectangular sheet, approximately 10×15 inches, taking care to keep the butter below cold. The thickness must not be thrown due to the baking process resulting in this proportion capacity to puff. 2. Shape the butter block: butter pieces were dispersed evenly using the pin, making sure not to compose the items big that too much pressure was applied. Step 3: How to Roll Out Puff Pastry Creating Layers Also Read: How Pastry Courses for Beginners Are Helpful To Every Aspiring Pastry Chef Step 4: Start Folding the Puff Pastry Final folds: • Additional Turns: after the fourth fold, repeat the process one more time for a total of six turns; the dough should get smoother and more pliable with each one. • Rest the Dough: after all turns are done, wrap the dough tightly in plastic and refrigerate for at least one hour or preferably overnight; during resting, the dough should fully relax, and the butter needs to firm up, which is crucial for making the perfect puff. Step 5: Keep Rolling the Puff Pastry Dough Until It’s SmoothFinal roll-out Final Rolling: After the dough has rested, roll it out one last time to your desired thickness, usually about 1/4 inch. Your puff pastry is now ready to use in your favorite recipes.Cutting and Shaping: Depending on what you are using the puff pastry to make, you may need to cut it into specific shapes or sizes. A clean-cut is important because it helps the pastry to puff during baking. Use a sharp knife or a pastry cutter. Success Tips What to Do with Puff Pastry Slices? After you make puff pastry, there are many recipes of dishes that you can use it with depending on the main product. They are: Conclusion Making homemade puff pastry is a labor-intensive process, but with proper storage and care of the dough, you will be able to create a truly delicious and flaky product. Here are a few steps to help you make puff pastry: Remember to keep everything cold and treat the dough gently. Creating puff pastry is only the tip of the pastry-making iceberg. In this regard, to level up and become a true master, consider pastry courses for beginners. Such courses provide comprehensive knowledge and a lot of practice that will help you get closer to the dream of becoming a pastry chef. If you want to refine your skills, you should definitely pay attention to short courses. Among the traditional topics, the following can be distinguished: The instruction combines online classes and classroom time. You can study at a convenient time and day. At the end of the training, you will be much more confident in your baking skills. Enroll now at the Best Bakery Institute in India and take your passion to the next level!

Chef representing career opportunities in baking and pastry
Bakery and Pastry Classes

Rise to Success: 9 Best Career Opportunities in Baking and Pastry

Bakery is one of the oldest and most continuously evolving careers since its beginning. Baking and pastry are part of the Food culture that has grown parallel to human civilization. With time passing, many authorities and setups offer a systematic learning curve for this artistic field of bakery. Starting with a basic Diploma in Pastry and Bakery can help you know more about the various skills, experiences, and expertise to grow in this industry. Moving forward, in this blog, we will discuss 9 best career opportunities for acquiring Baking and Pastry skills.  Reasons to Pursue a Career in Pastry and Baking Several scopes and opportunities come together with learning baking and pastry skills. Many commercial establishments as hotels, restaurants, food outlets, etc., offer different roles and responsibilities that young professionals choose to take the right step for their careers. Based on your skills and experience, you can grasp the opportunity, acquire skills, gain experience, and take the next step in your profession.  Career Opportunities in Baking and Pastry If you’re passionate about baking and pastry and creating sweet treats, there are many careere paths to explore. Whether you want to work in a bakery, start your own bakery business, or even teach others, here are some opportunities that might interest you: 1. Professional Baker Professional Baker is one of the foremost choices an individual aspires to in this field. To be to able stand out among thousands of participants and take the top position in the best hotels and restaurants in the country remains the dream of many. One can earn and work at their highest potential by becoming the leading industry expert in Bakery. 2. Pastry Chef Pastry is one of the global products, something every culture and human settlement discovered in their way. Hundreds and thousands of products, with their artistic representation, crunchy flavors, and savory taste, bring a lot of attraction and respect for a career as a Pastry Chef.  3. Cake Decorator Cakes are the highlight of every occasion in modern celebrations, especially weddings, anniversaries, parties, and many more. Cake decoration comes with specific techniques, skills, and expertise to build new designs, craft unique decorations, and showcase their abilities to customers in gaining a reputation for their personal and commercial brand.  4. Chocolatier Having comprehensive skills and knowledge to build products around Chocolate can help you become a professional Chocolatier. These experts can help commercial ventures to have expertise and showcase their value with chocolate-based products in building repertoire in gaining more popularity for their exotic dishes. 5. Bread Baker (Artisan Baker) Bread is one of the essential food stays of humans around the world. These breads are part of their breakfast, lunch, and dinner. Many professionals opt to become Bread Baker and gain expertise to be part of their traditional bread making. You can grow as a professional Baker in top establishments such as Hotels and restaurants or start your venture to bake loaves of bread and sell directly to customers.  6. Pastry Cook Like Bread, Pastry is another standalone product of a Bakery popular globally. A Pastry Cook role involves a small to medium-level food venture to learn all the beginners and advanced skills in offering your skills and products to their customers. Many Cooks will go on to open their food stalls, kiosks, and similar ventures to make a potential living for their skills.  7. Pastry Consultant Many professionals with long experience in the Bakery field also opt for careers as Pastry consultants. They can help new startups, beginners, hotels, restaurants, and other commercial spaces to build new menus, acquire equipment, and build daily activities to help owners & entrepreneurs deliver at their par excellence.  8. Food Stylist Modern food presentations, designs, and artistic views have brought new careers such as Food Stylists. Creativity brings new and unique ways to deliver food to customers. Stylists help evolve this industry to build new standards, try new presentations, and establish their lineage in this Food Industry.  9. Bakery Owner/Entrepreneur With the 21st century taking center stage, new career opportunities will carve the future for the next generation. With Baking skills, you can start your own business, pastry shop, bread store, and similar new craft to stay ahead of the curve.  Conclusion Learning bakery and pastry skills can help you develop professional skills to learn, earn, and build a substantial career for your future. A Diploma in Pastry and Bakery can add additional certifications and experience to start your professional life. One should have a complete consultation before selecting the course and guidance to fulfill ambition.  At Chef IBCA, We are one of the top renowned Bakery learning institutes in Delhi(India). We offer several courses and certifications to give learning and exposure to new-age professionals.  

Baking Blunders: 12 Common Mistakes to Avoid
Baking Courses, Baking Institute

Baking Blunders: 12 Common Mistakes to Avoid

We came across those scenes, where you followed a recipe perfectly (or so you think that!), started with preheating the oven, and boom, disaster occurred. A worse sunken cake and cookies that look and feel like hockey pucks, or a tart with those soft and soggy bottoms—baking is a wonderful science, but even Diploma in Baking experts fall prey to some of the most common blunders that can destroy your baking experiences. Don’t worry, these bad situations can be stepping stones in your baking journey! But by understanding these 12 mistakes and using some key baking tips, you can easily transform these treats from totally flop to super fabulous. Top 12 Baking Mistakes and How to Avoid Them Baking can be a fun adventure, but even the best bakers make mistakes. Let’s take a look at the 12 most common baking blunders and simple tips to help you avoid them and bake with confidence. 1. Not Preheating The Oven  This one is pretty simple, but it’s super important! Your oven is not ready from the get-go, it needs time to work and reach an optimal temperature for ensuring the best baking experience. Just imagine you prepare the batter and it goes into a lukewarm oven—not ideal for any type of baking experience.  2. Ignoring Measurements  Baking is a super precise art – just a sprinkle of this, a sprinkle of that, and some handful of content of this ingredient, a little more of some ingredient, and disaster. Measuring the ingredients unevenly can create many problems, from dense cookies to dry and unfluffy cakes. Invest in measuring tools like measuring cups along with spoons, or consider a kitchen scale for the best accuracy.  3. Using Expired Ingredients A baking powder past its date of use can’t give you the lift to the treats that they deserve. Always check the date of expiry or best-before date on packages of the ingredients you will be using in your ingredients, especially baking powder and baking soda. Choosing fresh items is the best choice.  4. Over Mixing The Batter Sometimes we are so enthusiastic about our baking that we forget that overdoing anything in baking can worsen it. One of those things is overmixing the batter. Over-mixing the batter develops the gluten in the dough and gives us cakes that have a very chewy, dense, and hard texture. Only mix till everything is combined and follow the instructions of the recipe.  5. Opening the Oven Door Too Often Checking how your recipe is doing inside the oven can be very tempting. But don’t do it. Every single time you open the door, a specific amount of heat escapes, making the oven colder, and potentially affecting the baking temperature and baking time as well. Trust that your oven is working well and open when necessary. 6. Skipping Sifting Sifting is necessary. Sifting those dry ingredients can help areate them. Leading to airier and lighter-baked products. While this is not an essential aspect, it can create a big difference in those delicate recipes and make them don’t have any clumps or any incorporation air in the final goods.  7. Not Greasing the Pan properly  A cake baked to perfection that sticks to the pan can be a real heartbreaker. To stay away from this kind of frustration, just ensure that you fully grease the pan in the inner part where you will be putting the main batter. Pay special attention to the corners and edges of the pan and grease them too. For super simple removal, you can also use parchment paper lining for simple and easy removal. This is like insurance for that tasty cake. 8. Overfilling The Cooking Pan  Filling the pan in one go till the top level seems like a great idea for maximizing the baking session. Overfilling is the perfect recipe for disaster. You won’t like your cake and bakery batter just flowing in the oven and creating a mess everywhere and even destroying your final product at the end or even the uneven edges of that cake.  We do mention that any type of filled pan obstructs airflow, providing hindrance for equal and even baking, potentially leaving with a bad result. Stick to the said recipe along with the right pan size and batter amount. As a general guide, always fill the batter half level or a little more than that and leave the rest empty to make the batter fluffy and rise during the baking process.  9. Underestimating Cooling Time It’s super tempting to just get into those warm and fresh, directly out-of-the-oven treats, but be patient. Cakes and bread become their best when left for some time. Give those hot cakes, breads, or cupcakes some time to cool off before jumping on them with frosting or slicing them. Instantly trying to eat these or doing anything to them freshly out of the oven can make them crumble. Let these baked goods cool, and they will get into a perfect texture. Then you can add frosting or something to them.  10.  Not Reading the Recipe Carefully This seems the most obvious. Everyone thinks they will not make any mistakes reading the instructions. But it’s such a common thing to make a mistake when you are skimming through the details of the recipe. Give time to yourself when you’re reading a recipe, read it in full detail, and pay attention to it. Pay attention to each ingredient and ingredient amount, plus the temperature, as well as any type of specific technique for baking or mixing. Understanding every step of baking is a sure way to achieve success in baking.  11. Adjusting for the Altitude  Do you know that at different altitudes, the air density and other changes, it can affect your baking? As the altitude changes, the lower levels of air pressure can affect how your goods can rise. If the recipe doesn’t make any mention of altitude changes, then you should be opting for a Diploma in Baking and Pastry

chocolate ganache recipe tips
Chocolate Ganache, Chocolate recipe

The Art of Chocolate Ganache: Tips and Tricks for Success

When it comes to desserts, chocolate ganache is the ultimate expression of indulgence. Its smooth and luxurious texture and strong flavor mean that it can be used in all sorts of sweet treats, including cakes, squares, tarts, and even truffles. Engaging in excellent chocolate ganache allows the baker to take his or her pastry talents to unprecedented levels. Knowing the basics of producing chocolate ganache may provide publishers of this guide with numerous opportunities to increase the taste of their goods and make them taste better than ever before. In addition, our guide touches upon several aspects of the chocolate ganache-making process, discussing the basics to the most advanced aspects. What is Chocolate Ganache? Chocolate ganache is just a mixture of chocolate and cream. But the kind of chocolate used and the proportion of chocolate to cream can vary the texture and flavor profoundly. Ganache made with dark chocolate has more flavor, while that with milk chocolate is creamier and sweeter. Despite any amount of cocoa solids, white chocolate ganache has a remarkable texture and a delicate vanilla bean taste. Therefore, it is crucial to distinguish the perfect type of chocolate to give the ultimate and most accommodating texture for any intended use. Also Read: Moist Chocolate Cake Recipe: Complete Guide Techniques and Variations Of course, the choice of chocolate is not the only variation when it comes to preparing chocolate ganache. Other techniques and variations are important to consider. Those include the method of tempering chocolate for a finishing touch, as it contributes to a smoother surface and adds gloss to the ganache.  The process of emulsification also plays an important role, as it automatically stabilizes the mixture so that it does not separate. In addition, there are various ways to add some flavor with the help of extracts, liqueurs, or spices, which can be a perfect addition to a new pastry recipe. Therefore, developing these techniques creates a new realm of possibilities to create something absolutely original and palatable. How to Make Chocolate Ganache? The process of crafting chocolate ganache is simple and requires a few ingredients while demanding some time and patience. Firstly, finely chop the chocolate to ensure an even melt when mixed with hot cream. Subsequently, bring the cream to a simmer in a saucepan, pour the warm cream over the chopped chocolate, and let it sit for a moment to soften. Then, gently stir the cream and chocolate combination until the chocolate is fully melted and you obtain a smooth, glossy ganache. The ganache may require additional chocolate if planning to make the covering thicker or any cream if planning to use it as a filling. Making chocolate ganache is easy when you follow the instructions below: 1. Select the Right Chocolate The first step to making chocolate ganache is choosing the right chocolate. Whether you like the bitterness of dark chocolate, the sweetness of white chocolate, or the creaminess of milk chocolate, choose high-quality chocolate suitable for your desired flavor. Chop it finely prior to mixing with the cream to ensure even melting.  2. Chop the Chocolate  Once you heat the cream and have picked your chocolate, use a sharp knife to chop it into small, even pieces that will melt evenly. Avoid chunks that are too big because they don’t melt as well.  Also Read: Classic Cheesecake: A Timeless Dessert for Any Occasion 3. Heat the Cream in a Small Saucepan Over medium-low heat, heat the cream until it simmers. Be careful not to boil the cream, which can change the texture of your ganache. Pouring the simmering cream over the chopped chocolate ensures that the hot cream melts the chocolate just enough without scorching it.  4. Combine the Chocolate and Cream  After the cream is ready, pour it over the chocolate and let it sit for a few minutes. Then, stir the chocolate gently from the center of the bowl until the chocolate is completely melted, resulting in a smooth texture.  5. Adjust the Consistency  Finally, you will have to customize the consistency of the ganache for your intended use. Add extra chocolate for a thicker form or more cream for a thinner consistency. Remember, however, that the ganache will firm up during the cooling process. Once it is smooth and hard, let the ganache cool to room temperature.  6. Cool the Ganache  When the ganache cools down to room temperature, it thickens and then can be spread with a spatula or piped onto a cupcake. Store the ganache in an airtight container and refrigerate for up to two weeks. Before utilizing it, let it reach room temperature and whisk it quickly. Conclusion: Finally, mastering chocolate ganache is not only a skill but an art that every pastry lover needs to develop. It is more than just a recipe as it creates a platform for creativity and innovation in the culinary. Understanding the ingredients and methods makes you have the power to create different versions. Additionally, depending on your preference and desired taste, you can create one that custom addresses your vision and also you can join a few baking certificate courses to master the chocolate ganache skill. Finally, whether you are a newbie who is getting into ganache or a chef who wants to play with flavor and texture, chocolate ganache is a sweet adventure. It makes you understand how ingredients interact, the power of chocolate, and how you can be more creative to create innovative desserts that will have your guest’s mouths drooling.  From the velvety smoothness of a bitter chocolate ganache to the creamy sweetness of white chocolate, each sauce offers pure creativity. Chocolate ganache is phenomenal for those special occasions—the sauce for a cake, the glossy glaze, or the lusciously thick filling for chocolates. FAQs Q1. Can I use chocolate chips instead of chocolate bars for ganache? Ans. Yes, you can also replace chocolate bars with chocolate chips while preparing ganache. Use high-quality chips with a high content of cocoa butter to get a successful result.

moist chocolate cake recipe
Cake baking classes in Delhi

Moist Chocolate Cake Recipe: Complete Guide

Diving into the world of baking, the pursuit of the ideal moist chocolate cake is a combination of art and science. A piece of chocolate cake has the power to uplift and soothe people, and baking is a really easy way to do this. There are many wonderful cake-baking classes in Delhi and recipes out there helping everyone prepare a former taste of moist chocolate cake. You’ll quickly become addicted to this chocolate cake recipe because of its incredibly moist crumb and delicate, yet light texture. For three times the chocolate flavor, add chocolate buttercream and chocolate chips on top. Regardless of your preference for it to be moist and black, rich and chocolaty, or fluffy and light, as long as you follow a few golden rules, it should turn great each time. This blog aims to elaborate on the intricacies behind achieving that luscious moisture texture, guiding you with every pinch step of creating a decadent delight that fascinates the taste buds.  Science Behind a Moist Chocolate Cake To prepare your chocolate cake soft and fluffy, you are just required to use stuff like baking soda and baking powder called raising agents that significantly help in giving a fluffy structure. Baking powder is made from baking soda, an acid, and starch mixed. It’s something that helps make dough rise, and it has both so and basic parts to make it work well. There are certain ingredients in cake recipes, like those that I include, that could seem hard or meticulous to those who aren’t familiar with them, but when you deep down acknowledge the science behind them, everything starts making sense. The baking certificate courses conclude the science behind a moist chocolate cake, understanding the importance and role of different ingredients. The accurate and exact combination of butter eggs, butter, sugar, flour, milk, cocoa powder, and vanilla essence provides a symphony of flavors and textures, ensuring an indulgent experience.  Key Ingredients for a Moist Chocolate Cake Here are some of the key ingredients that are highly required for preparing a wholly moist chocolate cake:  1. Butter and Its Impact on Moisture Butter’s high-fat content makes it essential for hydration. It coats flour particles when it melts during baking, further hindering the production of gluten and producing a soft and sensitive crumb. It’s a very essential component because of its ability to enhance flavor. By using unsalted butter, you can easily control the salt content. I think the reason your cake can taste a bit salty is because of the salt fluctuations in the butter. Some theories claim that salted butter might not be as fresh or of higher quality. Therefore, consider using unsalted butter, but if you are finding it hard to get then you can use a bit of salted butter.  2. Sugar and Moisture Retention Sugar contributes to the cakes’ moistness by absorbing and retaining water. White and brown sugar both have their unique qualities. Therefore, choose after finalizing the type of bake you are going for. Creaming brown sugar can take a little bit longer because it naturally contains more moisture than white sugar. It also interacts with proteins, creating a softer texture. Balancing sugar levels is crucial to achieving the right degree of sweetness and moisture. 3. Eggs and Their Moisture-Boosting Properties Eggs act as emulsifiers, binding fats and liquids. The presence of proteins in it provides a structure, while their fat content contributes to richness. Eggs also retain moisture, ensuring a luscious and moist cake. Eggs is seen as a crucial component of many baked things, due to their unique properties and the important contribution that they give to appearance, structure, texture, and taste. In cakes, cookies, muffins, waffles, pancakes, and many other other goods, eggs are used as a binder. Eggs are considered the natural binders, helping hold all other baking ingredients together and increasing the viscosity of doughs and batters.  Also Read: Baking Tips for Perfect Cakes 4. Flour and Its Impact on Moisture Levels The choice and quantity of flour influence moisture retention and the cake’s density. Using the right flour in the right proportion is very essential for achieving the desired crumb texture without compromising the structure. If there is too much flour, this cake will turn dry. Therefore if possible measure the floor to add to the food scale. Otherwise, to ensure the exact amount, gently spoon the flour into the measuring cup and measure its level with a flat edge.  5. Cocoa Powder and Moisture Absorption Cocoa powder, with an intense chocolate flavor, tends to absorb moisture. If you prefer a Richer color, I suggest swapping just 10 to 15 grams of the regular cocoa powder with the Dutch process. This will offer a deeper color without disrupting the batter. Adjusting liquid levels compensates for this, ensuring the cake remains moist without becoming dry or crumbly.  6. Milk or Buttermilk for Added Moisture Milk, or buttermilk, introduces liquid content, intensifying moisture and tenderness. The acidity in buttermilk reacts with baking soda, contributing to a very light and airy texture. This chocolate cake absorbs the moisture and acidity from buttermilk. We require a mix of sour cream and buttermilk for a preferred texture and taste.  7. Vanilla Extract for Flavor and Moisture Beyond imparting a subtle Vanilla flavor, the alcohol in vanilla extract helps in moisture retention. Its inclusion enhances the overall taste profile of the cake.  Also Read: make a cheesecake recipe without eggs Step-by-Step Recipe for Moist Chocolate Cake Here is a detailed step-by-step recipe for preparing a full-fledged moist chocolate cake:  1. Tools and Equipment Begin by ensuring that your kitchen is well-equipped with essential tools like mixing bowls, electric mixers, spatulas, and cake pans. Grease and flour the pans or line them with butter paper to prevent sticking the cake at the base of the pans. Preheat the oven to the specified temperature providing a conducive environment for a perfect baking.  2. Preparation Preparation includes arranging all the required materials that are to be

Bakery Business, Bakery Institute

The Ultimate Guide to Starting a Bakery from Home

Do you want to start a Bakery from Home because you love baking? Making a cake for a friend or relative is one thing, whereas opening a bakery business needs thoughtful planning and preparation. Numerous elements come into play, including financial and other costs, licensing, registration, employing a group of experts, and general administration. Over the past ten years, the baking institutes in India have changed. These days, bakeries provide a wide variety of sweets in addition to cakes and pastries. In India, the home baking industry is regarded as one of the highest-paying and most successful industries nowadays. A lot of people who have a strong passion for baking have found success in their home-based businesses. A home-based business, like any other, needs full-time attention and focus for growth and better revenue. Is Starting a Bakery Business Right for You? Starting a bakery takes a combination of culinary skills, business savvy, and a sincere passion for baking delicious cookies, cakes, cupcakes, and many more items. Evaluate your baking ability and your capacity to handle the complexities of managing a baking business. Passion by itself might not be enough; it’s important to comprehend consumer preferences, market trends, and fundamental financial concepts. After you have decided that starting a bakery is a good fit for your goals and strengths, it’s time to learn how to do it with the assistance of the best bakery institute in India, from the comfort of your home.  Also, Read Career Advantages of Professional Baking Certificate How to Start a Bakery from Home Here are some of the points to consider before starting a home bakery:  1. Planning Your Home Bakery Business : Bakery from Home It doesn’t take much planning to launch a small-scale home-based bakery. But having a business plan is essential from a business perspective. This promotes improved marketing and administrative efficiency for expanding businesses. Choosing the recipes, testing them, putting up an online ordering website, marketing, and promoting the business are all part of the planning process. Make sure you complete the required licensing and registration before launching the firm. This even gets an exemption and aids in the GST computation. GST exemption is contingent upon a minimum yearly revenue of Rs 20 lakh. An important part of the bakery business’s branding is its name and logo. The company’s name and emblem serve as its public face. 2. Legal and Regulatory Compliance Before you put on your apron, there are additional legal requirements to think about when starting a home baking business. Operating a home bakery may necessitate possessing a business license in certain states. Depending on your state, you might also require a food manager license from the health agency. 3. Sourcing Ingredients and Suppliers You can acquire everything you need to carry out your offerings after you know what you’re going to bake. Make sure you have everything ready to go, including piping bags, tips, cupcake wrappers, cake tins, and various cake or muffin tins. You should also have a place to put it all. 4. Setting Up Your Kitchen Remember that some states have cottage food regulations that require keeping your bakery equipment separate from your kitchen equipment. To account for the cost of your goods when you price your menu and file your taxes, ensure to keep track of their total cost. 5. Developing Your Bakery Menu Maintaining a menu that is diverse and has a range of things is crucial. Improved abilities and methods lead to a better proliferation of home-based baking businesses. Start with the basics, in which you are always proficient and have firsthand experience. By attending workshops or lessons, you can gradually improve your skills and incorporate more recipes, tastier cakes, and a wider variety of bakery products. A well-designed menu makes it easy for clients to browse through several selections and place their orders. 6. Marketing and Promotion The next crucial stage in the bakery business plan is marketing and promotion once the recipes, supplies, and equipment are selected. There are numerous approaches to market and promote the company. Improved revenue and sales are facilitated by the company’s online presence. The initial step is to arrive with baked products prepared for sale. However, you can get folks enthusiastic about discovering your booth at the neighborhood farmers market with a little marketing and advertising. You can publish pictures and videos of your gorgeously iced cakes and pastries on a visual social networking site like Instagram. You may advertise a weekly deal to entice customers to visit your stand every week! You might even use a unique freebie to encourage customers to interact with your brand. Another venue where potential clients may see your behind-the-scenes operations is TikTok, albeit making visually appealing baking films could require a little more expertise. Remember to account for the time you devote to advertising and promotion, as well as the costs of any digital tool you pay for, into your COGS. You can also encourage your customers with a “buy 9 and get one free offer”.  7.Setting Prices for a Bakery from Home Setting prices requires much more than just looking at what your rivals charge and setting your price for your baked goods. With any money left over for profit, your baked goods may be able to pay for your labor, ingredients, and other overhead such as business licenses and farmers market fees. However, how are you going to calculate all those numbers? Therefore, do consider the following points while setting the prices of the baked items:  Conclusion Many people have become entrepreneurs and secured a reliable monthly income by starting a home-based bakery business. Numerous tiny home-based bakeries have experienced rapid growth and expansion into larger commercial spaces. Establishing a home-based baking business involves careful planning, money management, aggressive, astute marketing, and ongoing skill development.  These above pointers will assist you in comprehending and determining how to open a bakery; therefore, consider all of it before starting a home bakery. With years of experience, Chef IBCA,

Baking Tips
Baking Institute

Baking Tips – How To Get Better Result Every Time

Rise & Shine! Conquer Your Kitchen With The Best Baking Tips in Town  Ever dream of those lip-smacking cakes and pastries you see in TV shows or cooking magazines? But if you don’t know how to do it, then dish out those oven blues and get started today, as we will be sprinkling some of those magic tips to get you rolling those sweet treats from your kitchen. Here are some of the best baking tips to get better results every time.  Measure Like a Pro  Of all those baking tips, we think this is the most important tip to becoming the best at baking. This is the number-one rule in baking. If possible, use a digital scale to measure all of your ingredients.  If you don’t have a digital scale, then you can use a technique called the Spoon & Level method: Spoon every ingredient into a cup used for measuring (make sure that the measuring cup is dry) and just level the cup with a straight edge. A cup of floor that’s too much can easily make your cake or pastries dry.  Measure the liquid ingredients in a transparent measuring cup and measure them perfectly according to the scale of the cup.  Become a Mix Master  While hand whisking can be a workout, a great mixer will become your BFF. It can save a lot of time, effortlessly mixing all the ingredients, and you don’t need your arm strength to mix all the ingredients. The time saved can help you focus on other things like cake decorations and other stuff.  The other alternative that can get the job done is an electric hand mixer. Although not as efficient as professional whiskers it still will work but can take a little bit more.  The Room Temperature  When a recipe says it has to be created at room temperature, do that. Cold butter cannot become cream at that moment, and cold eggs can’t be shocked and made into one batter.  The best way to do that is to leave the ingredients on the countertop and out of the fridge the night before the preparation. That will bring them down to room temperature. Bring the eggs down by putting them in warm water (not hot water) for a few minutes.  You can use a microwave to bring the butter down to room temperature. Don’t overdo it and as soon as the butter softens, remove that from the microwave. Cut it into sticks, keep rolling it in a bowl, and microwave it for 10 seconds until soft. Don’t overdo it.  Checking the Oven Temperature  Check your oven temperature to check the accuracy. Don’t open your oven if the baking time is not complete. The only exception is if you see one side of your cake or the other being cooked too much and the other side is not cooked, then you can open it and rotate the container.  Say No To Substitutions  Stick to your recipe as much as possible. We have all come to scenarios where we don’t have one ingredient, let’s put something else that tastes and feels like that, don’t do that.  There’s zero substitute for all-purpose flour, eggs, or butter. Still, there’s nobody that will put you behind bars for putting ingredients of your choice in your dessert. Just don’t alter the ingredients too much so that it ruins the taste at the end. This is where the professionals can teach you how to do it. If you are in Delhi, you can take Baking Classes in Delhi to learn the art of effortless and amazing baking.  Also Read: 9 Baking Tips by Experts for Home Bakers Gentle Hands  Think of butter as a cloud, not as a punching bag. Overmixing is the enemy of great cakes and light cookies. When you overmix, it starts to produce gluten, which will give it a tough and chewy texture, which will ruin your cakes and pastries.  Understand Leavening Agents: Baking Soda, baking powder, and yeast are the magic ingredients for the bakery world. Learn about their superpowers (leavening, gas production, and gluten development) and how to use them. Little less and it won’t work, a little more and it will destroy the whole. Use these wisely.  Adding Ingredients with Flair! Instead of just dumping every ingredient in the bowl like a big lump, try adding ingredients in little piles. Put ingredients slowly and in piles and mix them lightly when you are preparing the batter.  Prepare Pans Properly  Grease your pans properly before putting any batter into them. You can also use parchment paper if needed and preheat this paper (use the lowest temperature to heat it) before putting batter over it.  Scooping Batter With Precision This is important; use portion cups or ice cream scoops for measuring cookie dough for cupcakes, muffins, etc. The scoop gives you better consistency and it will get the job done easily. Some of the best Cooking courses in Delhi will teach you all these skills on a pro level.  Use Quality Ingredients  This is a brainer. Better ingredients, better results! Try to find the recognized brands that have been in the business of creating these ingredients for a long time. Buying a great-quality All-purpose flour or different essences, chocolates, etc can make a difference.  This is where the art of professional bakers comes in. if in the metro region, you can take baking classes in Delhi and these guys will tell you the art of buying the best quality ingredients and how to use them.  High-Altitude Baking Tips for Perfect Results When you are baking at high altitudes, you have to make some adjustments by yourself.  Conclusion  With these tips, you can hone the art of the best baker. Baking a proper cake or pastry can be difficult, but these tips can help you become the best. Also, be a professional baker and learn the art of baking from the best Bakery classes in Delhi to hone your skills. 

Scroll to Top
Call Now Button